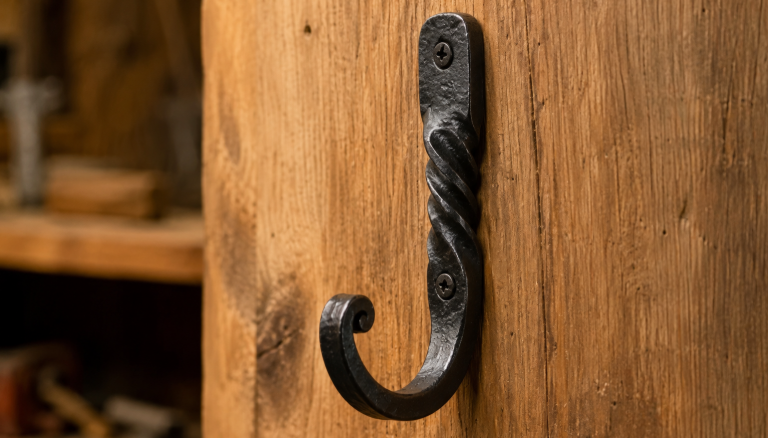
A forged hook is an excellent first blacksmithing project. It gives you practice with tapering, bending, scrolling, flattening, and optional twisting—without requiring heat treatment or complicated joinery.
This guide uses a simple J-shaped wall hook made from mild steel. You can finish it with a small curled tip or add one twist for extra decoration. The measurements are starting points rather than rigid rules; adjust the design for the hook’s size and intended use.
Safety first: Forge only in a properly ventilated work area with suitable protective equipment and fire controls. Never heat galvanized, zinc-coated, painted, or unknown coated metal.
What You’ll Make
The finished hook will have:
- A J-shaped body
- A tapered, curled tip
- A flattened mounting pad
- One mounting hole
- An optional twist in the shank
- A wax finish for indoor use
For a manageable beginner project, start with:
| Part | Suggested starting point |
|---|---|
| Steel | Clean, known mild-steel bar |
| Stock size | 3/8-inch square bar (about 10 mm) |
| Smaller alternative | 1/4-inch square bar (about 6 mm) |
| Starting length | Approximately 7–8 inches (18–20 cm) |
| Main profile | J-shaped hook |
| Decoration | One small scroll or one twist |
| Finish | Paste wax or beeswax-style metal wax |
A hook made from 1/4-inch stock will suit a smaller, lighter design. The 3/8-inch size gives you a little more material and working time, making it a useful compromise for a beginner. A larger 1/2-inch bar (about 13 mm) may be appropriate for a larger design, but it will require more heat and heavier tools.
Do not assign a specific weight capacity to the finished hook. Its safe use depends on the steel, shape, mounting hardware, wall material, and installation.
Tools and Materials for a Beginner Forged Hook
You do not need a power hammer, grinder, or specialty jig for this project. Basic hand-forging equipment is enough.
| Tool or material | Purpose | Beginner note |
|---|---|---|
| Clean mild-steel bar | Becomes the hook | Use known, uncoated stock for the finished project |
| Forge | Heats the steel | Propane, coal, or charcoal forges can be used with suitable ventilation |
| Anvil | Supports the work | A stable face and usable horn are helpful |
| Tongs | Hold hot steel | Choose jaws that grip the stock securely |
| Flat-faced hammer | Moves the metal | A general-purpose blacksmithing hammer is sufficient |
| Vise | Holds the hook for an optional twist | Clamp the work securely before applying force |
| Anvil horn | Forms curves | Different positions provide different bend radii |
| Hot punch or drill | Makes the mounting hole | Drilling the hole cold is easier for many beginners |
| Wire brush | Removes loose scale | Brush carefully and wear eye protection |
| Measuring rule and marker | Helps plan the profile | Mark the cold bar before heating |
| Fire extinguisher | Emergency fire response | Keep suitable equipment immediately accessible |
| Paste wax | Protects an indoor hook | Apply only after the piece has cooled sufficiently |
Before heating the bar, test your tongs on cold stock. The grip should be secure without excessive force. A loose grip can let hot steel shift or fly when struck.
Safety Before You Start Forging
Wear suitable hot-work protection
Use:
- Safety glasses with side protection
- A face shield when brushing, grinding, or handling operations that may throw scale
- A natural-fiber, long-sleeved shirt
- Long pants
- Leather boots that cover the ankles
- Hearing protection
- Properly fitted leather gloves for handling hot stock
Avoid synthetic clothing, loose jewelry, open footwear, rolled cuffs, and clothing with oily or frayed areas where sparks can lodge. Hot-work hazards include sparks, slag, fumes, noise, burns, and fire. (OSHA hot-work PPE guidance)
Ventilate the forge area
Work outdoors or in a workshop designed for hot work. Combustion gases and metal fumes must not collect in an enclosed garage or small room. Ventilation should move fumes away without blowing sparks toward combustible materials. NIOSH recommends suitable engineering controls, including local exhaust ventilation, for metalworking fumes. (NIOSH engineering controls for welding operations)
A household fan is not automatically an adequate fume-control system.
Never forge galvanized or coated metal
Do not heat galvanized or zinc-coated steel. Heating the coating can release zinc oxide fumes and cause metal fume fever. Symptoms may include chills, fever, muscle aches, coughing, nausea, and breathing difficulty. (NIOSH: Metal Fume Fever)
Avoid painted, lead-coated, cadmium-coated, and unknown scrap as well.
Control sparks and hot metal
Before lighting the forge:
- Clear cardboard, sawdust, solvents, oily rags, and other combustibles from the area.
- Keep a suitable fire extinguisher within immediate reach.
- Use a designated place for hot workpieces.
- Keep sparks and scale contained.
- Inspect the area for smoldering material when you finish.
Never use a plastic bucket for hot metal or hot scale. Remember that steel can remain hot after it stops glowing. Treat every piece as hot until you have deliberately checked it.
Step 1: Plan and Mark the Hook
Sketch the hook at full size before you begin. A simple drawing helps you keep the mounting pad, bend, and decorative tip in proportion.
Mark or note:
- The approximate mounting-pad length
- The location of the main bend
- The hook opening
- The length of the tapered tip
- The location of an optional twist
Keep the first design simple. A plain J-hook with one curled tip is easier to align than a hook containing several scrolls, a leaf, and multiple twists.
Step 2: Heat and Forge the Tapered Tip
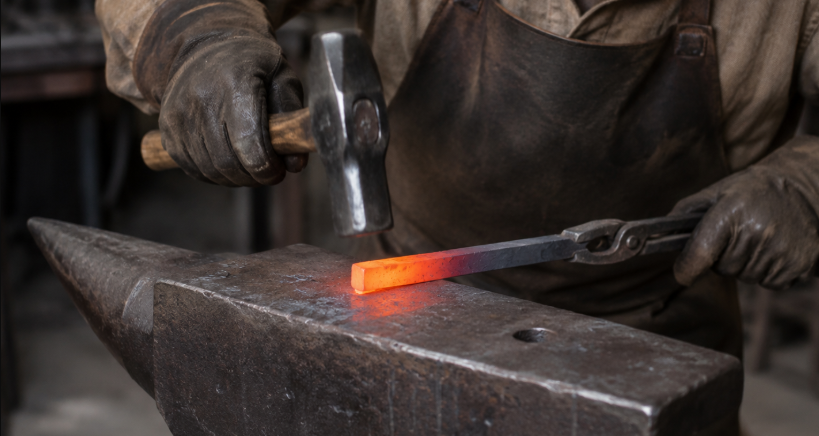
Heat one end of the bar until it is hot enough to move readily under the hammer. Bright orange is a common practical cue for mild steel, but color changes with lighting and is not an exact temperature measurement. If the steel resists normal hammer blows, return it to the forge rather than forcing the work.
Place the heated end on the anvil and draw it out into a gradual taper.
- Position the working end near the anvil edge or on the face, depending on the taper you want.
- Use controlled, overlapping hammer blows.
- Rotate the square bar regularly so all four faces are worked.
- Keep the taper centered along the bar.
- Reheat whenever the steel becomes difficult to move.
- Leave the end rounded or slightly blunt rather than making a needle point.
Drawing out means lengthening and thinning the steel through hammering. Rotating the stock helps prevent a lopsided taper. The beginner hook instructions from The Crucible also emphasize regular rotation while drawing out the tip. (The Crucible’s forged-hook project)
Checkpoint: The taper should transition gradually into the thicker bar. If you see a sharp step, reheat that area and blend it with lighter blows.
Step 3: Curl the Decorative End
A small scroll is a beginner-friendly decorative detail. It also removes the sharp, exposed point from the end of the hook.
- Reheat the tapered section.
- Place the tip over the anvil edge or horn.
- Start the bend with light, controlled blows.
- Rotate and reposition the bar as the curl develops.
- Close the curl gradually rather than trying to make the entire shape in one heat.
- Leave a useful opening so the hook can accept the item you plan to hang.
A tight, closed curl may look decorative but can be difficult to use. Avoid a sharp fishhook-like point that could snag clothing or scratch someone. A rounded scroll is safer and more practical. (The Art of Manliness hook-making guide)
Let the tip cool in a controlled way when necessary, but do not handle it until you have confirmed that it is safe.
Step 4: Bend the Main Hook
Now form the J-shaped body behind the tapered tip.
- Heat the area where the main bend will begin.
- Place the bar over the anvil horn.
- Start the curve with light blows near the bend.
- Move the work around the horn as the curve develops.
- Reheat and continue gradually until the hook has the desired opening.
- Check the profile against your sketch.
The horn provides different radii. Moving the stock closer to the end creates a tighter curve, while using a broader section produces a more open bend.
Avoid forcing the whole curve in one blow. A gradual bend is easier to control and less likely to develop a sharp kink.
Design check: Leave enough clearance inside the hook for a coat, rope, tool handle, or other intended item. Do not close the opening simply because the curve looks attractive.
Step 5: Flatten the Mounting Pad
Heat the opposite end of the bar and flatten it into a mounting pad.
Place the heated section flat on the anvil and use controlled blows to create a surface that can sit against a wall. Keep checking the pad from the side and end.
The mounting pad should:
- Sit flat without rocking
- Be wide enough for a mounting hole
- Retain enough material around the hole
- Transition smoothly into the hook shank
- Hold the hook approximately perpendicular to the wall
If the pad becomes twisted, reheat a small area and correct it gradually. Do not wait until the entire hook is cold and then try to force it straight.
Step 6: Make the Mounting Hole
You have two practical choices.
Option A: Drill the hole cold
This is usually the simpler beginner method.
- Allow the hook to cool completely.
- Mark the hole location on the mounting pad.
- Center-punch the mark so the drill bit will not wander.
- Clamp the hook securely.
- Drill with suitable eye protection and cutting lubricant.
- Remove sharp burrs from both sides of the hole.
Keep the hole far enough from the edges that the mounting pad will not tear or distort around the fastener.
Option B: Punch the hole hot
Punching creates a more traditional forged hole, but it requires more coordination.
- Heat the mounting pad.
- Set the punch where you marked the hole.
- Drive it partway through.
- Turn the work over.
- Continue from the opposite side.
- Remove the punched slug and clean the hole.
Punching partway from each side can reduce distortion and produce a cleaner opening. Keep the punch aligned with the pad and cool the tool as needed. (The Crucible’s forged-hook project)
Question: Do you need to punch the hole hot?
No. Drilling the hole after the hook has cooled is a perfectly reasonable beginner option. Punching is a traditional technique, not a requirement for a functional hook.
Step 7: Add One Optional Twist
A single twist adds texture to the shank, especially when using square bar. Skip this step on your first attempt if you want to concentrate on the hook shape.
- Decide which straight section will receive the twist.
- Heat only that section.
- Clamp the work securely in a vise.
- Fit a suitable wrench over the stock.
- Twist slowly and evenly.
- Stop after a quarter-turn, half-turn, or one full turn.
- Reheat and realign the hook if the twist has pulled it out of position.
Do not apply excessive force to a cold bar or an area that is not hot enough to move. A twist added after the hook is fully bent may distort the curve, so it is often easier to add it before final alignment.
The decorative twist is optional. One controlled feature usually looks better than several uneven ones on a first project.
Step 8: Straighten, Clean, and Finish the Hook
Align the shape
Before finishing, check that:
- The mounting pad lies flat.
- The hook faces outward.
- The tip does not point toward the wall.
- The curve is smooth rather than kinked.
- The opening is large enough for its intended use.
- The hook does not rock on a flat surface.
Reheat small areas and correct them gradually. Do not try to make major cold corrections with the hammer.
Remove loose scale
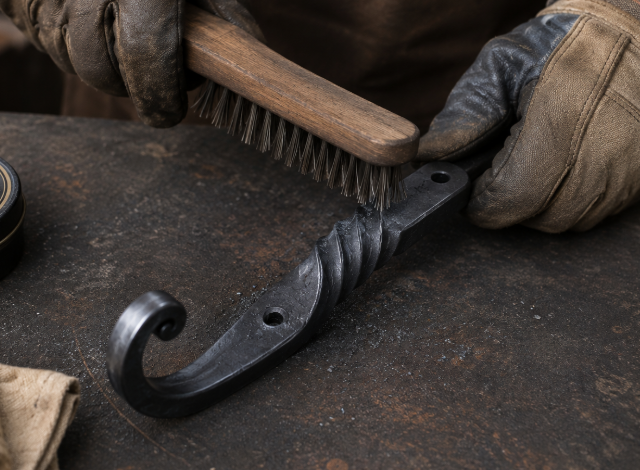
Scale is the oxide layer that forms when steel is repeatedly heated. While the piece is warm but safe to handle, brush away loose scale with a wire brush. Wear eye protection because flakes can travel unexpectedly. (The Crucible’s forged-hook project)
Apply a simple indoor finish
For an indoor hook, paste wax or beeswax-style metal wax is a straightforward default.
- Clean away loose scale and dirt.
- Let the hook cool enough to handle safely.
- Apply a thin coat of wax.
- Buff away excess wax with a clean cloth.
- Allow the finish to set according to the product instructions.
Wax keeps a low-sheen forged appearance. A suitable clear coating or metal paint may be more appropriate where the hook will regularly encounter moisture, although the result may look glossier. (The Art of Manliness hook-making guide)
Avoid making hot-oil finishing your default beginner method. Oil can flare or ignite when applied to hot metal. A mild-steel hook does not need oil quenching for hardening.
Common Beginner Mistakes With Forged Hooks
Hammering steel after it has cooled too far
If the bar no longer moves easily, reheat it. Excessive force on cold or barely warm steel makes the work harder and can produce poor shapes.
Making the taper too abrupt
A sudden step between the taper and the shank looks unfinished and may create a weak transition. Use overlapping blows and blend the change gradually.
Forgetting to rotate square stock
A square bar that is never rotated will develop an uneven taper. Turn it regularly while drawing out the end.
Making the hook opening too small
Decide what the hook will hold before closing the curve. A decorative hook still needs practical clearance.
Leaving the tip sharp
Round or curl the tip so it will not snag clothing or scratch skin.
Adding too many decorative features
A scroll, twist, leaf, and additional curl can make alignment difficult. Start with one feature and add complexity on later projects.
Punching too close to the edge
Leave sufficient metal around the hole. A hole near the edge can distort or tear when the fastener is tightened.
Ignoring the mounting pad
The back of the hook must sit flat against the wall. A crooked pad can make the hook rock, twist, or pull away from its fastener.
Using unknown scrap for the finished hook
Rebar and railroad spikes can be useful for rough practice, but their alloy, condition, and coatings may be uncertain. Clean, known mild steel is more predictable for a finished project.
Easy Variations After Your First Hook
Plain J-hook
Remove the twist and use a simple rounded or curled tip. This is the best version for learning the basic sequence.
Scroll-tip hook
Make the end curl slightly larger or more pronounced while keeping the main body simple.
J-hook with a shank twist
Add one twist to the straight section for texture. Square stock makes the change especially visible.
Leaf-end hook
A leaf requires additional flattening, shaping, and symmetry work. Treat it as a follow-up project after you can make and align a plain J-hook. (Blacksmithing Basics beginner project progression)
Railroad-spike hook
A clean railroad spike can create a rustic hook with a built-in head, but it is chunkier and less predictable than new mild-steel bar. Do not heat one if its coating or condition is unknown.
S-hook
An S-hook removes the need for a mounting pad and hole, making it a useful next project for practicing tapering and bending. The National Park Service presents wall-hook work as part of a progression from basic S-hook techniques. (National Park Service wall-hook video)
Frequently Asked Questions
What is the best steel for a decorative hook?
Clean, plain mild steel is the best default for this project. A decorative hook does not need a cutting edge or heat treatment, so complex tool steel is unnecessary. Known stock is preferable to unknown scrap.
What size steel should a beginner use?
Use approximately 1/4-inch stock for a small, light-duty hook and 3/8-inch stock for a more substantial coat or utility hook. The correct size depends on the hook’s shape and intended use.
Can you make a hook from rebar?
You can use rebar for rough practice, but it has an inconsistent alloy and a ribbed surface. Clean mild-steel bar is more predictable and usually produces a cleaner finished hook.
Can you forge galvanized steel?
No. Do not heat galvanized or zinc-coated steel. Its coating can produce hazardous zinc oxide fumes and may cause metal fume fever. (NIOSH: Zinc Oxide)
Do you need an anvil to forge a hook?
You need a stable, heat-resistant striking surface. A proper anvil makes the work easier because its face supports flattening and its horn helps form curves. The article’s bending method assumes access to an anvil horn.
How hot should the steel be?
Work the steel when it moves readily under controlled hammer blows. Bright orange is a common practical cue for mild steel, but visible color varies with lighting and should not be treated as an exact temperature.
Should you quench the finished hook?
Not for hardening. A mild-steel decorative hook does not need heat treatment. Cool a section only when necessary for handling or to protect a finished area during shaping.
How do you stop a forged hook from rusting?
Remove loose scale and apply paste wax for an indoor hook. For damp locations, use a suitable clear or painted metal coating and inspect the finish periodically.
Why does the hook sit crooked?
The mounting pad may not be flat, or the hook may have twisted during tapering, bending, or optional decoration. Reheat small areas and correct the alignment gradually.
Is a decorative forged hook strong enough for coats?
It may be suitable for light household use when made from appropriate stock and securely mounted. However, do not rely on an assumed weight rating. The complete hook, fastener, and wall substrate determine how it performs.
Final Checklist Before Mounting
Confirm that:
- The hook opening is large enough for its intended item.
- The tip is rounded or curled rather than sharp.
- The mounting pad sits flat.
- The hook faces outward.
- The mounting hole is clean and far enough from the edges.
- Loose scale has been removed.
- The finish is suitable for the location.
- The wall fastener matches the wall material.
- The hook is not being used for a load it was never designed or tested to carry.
A simple J-hook is enough for a successful first project. Once you are comfortable tapering, bending, scrolling, punching, and aligning the steel, you can experiment with twists, leaves, S-hooks, and more elaborate ornamental designs.