Since it is the beginning of the new year, it is also the time for a new aspiring hobbyist to get started with various crafts, including blacksmithing. The real beauty of blacksmithing is the fact you can make a lot of tools yourself and therefore save a lot of money. So, in this article, I decided to show you how you can start forging for only $100.
To start forging at a low cost, you only need the forge, an anvil, a hammer, and tongs. You can make your forge and use some anvil alternative, such as a railroad track.
Also, you don’t need some advanced hammers and tongs, instead, buy the basic ones which don’t cost much. When it comes to material, you can mostly get it for free at a scrapyard.
Forge ($25) + Anvil ($15) + Hammer ($20) + Tongs ($40) = $100
How to Start a Forge for $100
And now let’s examine each tool so you know which one to buy and see exactly how much it will cost you. As I have said before, the forge you will have to make it yourself so make sure to check the necessary instructions.
How Much Money Does a Forge Cost?
Expected cost: $25
No forge, no forging. It is that simple. Without something to heat the metal, there is nothing you can do other than change your hobby. You can consider the forge as the heart of the blacksmith shop. It requires two components: fuel and air. One of them is free and the other is not.
Today, you can choose between a variety of different fuels such as coal, charcoal, wood, propane, natural gas, etc. Since this article is about the cheapest way to get into forging, the recommended fuel is wood. The wonderful thing about wood is the fact it is mostly cheap or even free. It is also easily available, which makes it even more desirable. Note that a lot of farms have a pile of wood scraps from shops and fences.
In terms of construction, if you want to get into blacksmithing as cheaply as possible, making your own forge is the best option.
So, be sure to check out our article on Easiest Way to Build a Forge, where you will find everything you need to know about how to make it and what you will need. All in all, you may spend somewhere between $20 and $30 on the materials.
As you can see, this is nothing compared to buying a completely new forge which costs a couple of hundred of dollars. When you make the forge, you will be able to make most beginner blacksmithing projects. After some time, you can buy the new forge or make a more advanced design, the choice is up to you. Until then, you will be just fine with this one.
In case you work indoors, make sure you have good ventilation to prevent a potential hazard. In case you decide to work with propane, having a carbon monoxide detector is crucial. Other ways of getting the forge are to check farm auctions and antique shops, where you could find some forges at a very low price.
If you have a neighbor who has the old forge and wishes to throw it away, you can ask him to give it to you. Most people will be happy to give them away for free.
While you could also use coal as a fuel, wood is the cheaper option, sometimes even free. Actually, you would be surprised by the number of people who would give it for free. For instance, if you know someplace where landscaping projects were done, chances are people will give away the wood for free, especially if it was done on a farm.
How Much Is a Blacksmith Anvil?
Expected cost: $15
Except for having something with which you can heat the metal, you also need some hard surface on which you can hammer it. This is where the anvil comes into play. You can think of an anvil as the working table for a blacksmith. Work at the anvil is where the most forging action is done. Without one, the work would be impossible. You may already know that a blacksmith anvil can be very expensive, sometimes even over $1000.
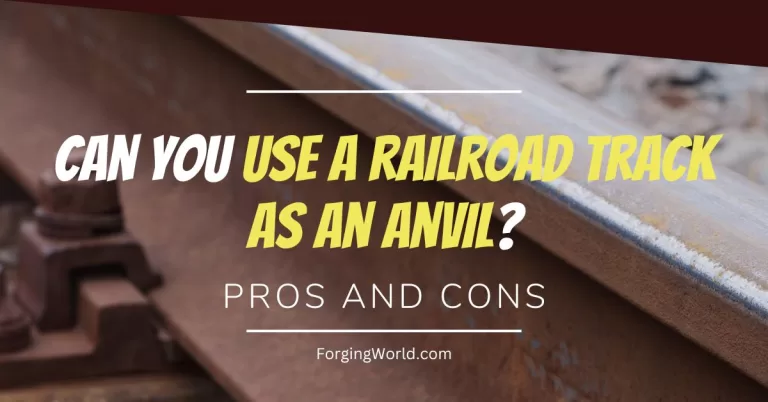
Fortunately, you don’t need any expensive anvil for starting purposes. Heck, you don’t even need the “real†blacksmith anvil. You can basically start with any hard metal surface on which you can forge your material. For example, a railroad track is an excellent anvil alternative. It is mostly cheap and easily available. Just be careful not to search for them at the railroad property because you can easily get yourself into legal issues.
I would recommend asking your friends and neighbors whether they have some old piece of railroad track sitting in their garage. You would be surprised how many people have it. If you can get it for free, perfect. The railroad track is a great anvil alternative for beginner blacksmiths since you can make both small and medium-sized projects.
In case you can’t get your hands on a railroad track, another extremely popular option is a piece of scrap steel. It costs only $15 which is nothing for an anvil alternative. This was my anvil in the beginning phase. You can easily anchor it on a stump if you have one. Unfortunately, it doesn’t have a horn, but there are ways around it.
So, if you can get a free railroad track, perfect. If don’t, buy yourself that nice piece of scrap steel that will also serve for starting purposes. Ok for now we have spent around $40, so we have $60 more to spend.
Let’s jump on the next tool.
How Much Is a Blacksmith Hammer?
Expected cost: $20
Another tool without which forging would be impossible is a hammer. I often like to say that a hammer is an extension of the blacksmith’s arm. Another way of phrasing it is that a hammer is to a blacksmith like a brush is to a painter. You will use a hammer every single day, there is no way around it. Ok, we established the importance of this tool.
As you may already know, there are many different types of hammers but one is typically recommended for beginners. That would be a cross-peen hammer. This one has the wedge end of the peen which is angled perpendicular to the handle. Cross-peen hammer allows you to work in a small, restricted area without any problems.
Another reason why a cross-peen hammer is handy is that it is an ideal choice for a drawing technique which most beginners do a lot of. However, you should pay attention to the peen. Namely, if the peen is too sharp, it can cut into the material instead of drawing it. Besides drawing out, this hammer is used in riveting.
Don’t forget about the weight of the hammer. Usually, an ideal hammer weight for a beginner is somewhere in the range of 1 to 4 pounds, not heavier than that. Hammers in this range allow for better control and precision. Not only that, but they also allow you to work much longer and more efficiently. Hammers that are heavier than 4 pounds drastically decrease muscle endurance. So, I would recommend avoiding large hammers as much as possible, at least in the beginning.
My favorite choice for beginner blacksmiths is without any doubt Estwing Sure Strike Blacksmith’s Hammer. You can choose between 32,40 and 60 oz variations. Due to the hardening and tempering of the process of its head, this hammer serves me up to this day. Again, highly recommend this one.
Before you start striking any metal, you have to learn the proper hammer technique first. If you just keep hammering without any idea what you are doing, you could end up injured. By learning the proper technique, you won’t just reduce the likelihood of injury but you will also be able to work longer with more efficiency.
How Much Are Blacksmith Tongs?
Expected cost: $40
Last but not least you need blacksmith tongs. Without something to hold your material during the work, it would be almost impossible to forge. Good blacksmith tongs allow the smith to work safer and more effectively. The crucial thing to understand is that tongs have to fit the stock you are using. For instance, you cant use tongs made specifically to hold a 1-inch bar to hold something else.
Using the wrong size or type of tongs can be very dangerous. Namely, the heated material can easily slip and hit you directly on the face. I don’t want you to learn this from your own experience. Be smarter than that and learn from this article.
A couple of months ago, I worked with a thick bar, so I tried to hold it with small pick-up tongs. You can guess how that went. The heated bar slipped away and hit my arm. It wasn’t the day I like to think about very often.
My general recommendation for beginners is tongs long anywhere between 16 and 20 inches. Keep in mind that the longer they are the heavier they are. This is why light tongs are better suited for a typical beginner because he can hold them much longer. On the other hand, long tongs allow you to stay at a longer distance from the forge.
Note that there are many different types and sizes of tongs but wolf-jaw tongs are generally considered the best option for all beginner smiths. They can hold an incredible number of different shapes and sizes of stocks. Wolf-jaw tongs are easily available and are not expensive.
I highly recommend checking out the Picard Hammer – Blacksmiths’ Tong. These tongs are one of the most popular choices for all beginner blacksmiths. I bought them 2 years ago and I could not be happier with them.
After some time, you can buy or make another pair of blacksmith tongs. In fact, you will quickly realize that as you get more advanced, you will also need more tools.
What About the Material?
Expected cost: $0
And finally, you need something to forge. The good news is that most scrap metal laying around would work. Scrap metals such as rebar, spring coil, railroad spike, and circular saw blade are just a few that can be used for making various items, such as knives. Rebar for example is not the best material but makes excellent practice material.
However, if you want to make something more serious as your beginner project, you should use a better metal such as industrial-grade steel or iron ingots. You can use a lot of different metals, just don’t use any galvanized steel. Galvanized steel produces toxic fumes that can be extremely dangerous to your health.
So, should you pay any money for the material?
Let’s put it this way. If your primary goal is to practice forging various items, then no, you don’t need to spend any money on the material. On the other side, if you want to make some particular project that may require having specific steel, then yes, you have to buy that steel.
Know that there are tons of online ads of people offering random metal or steel material lying around in their garages. The only thing you have to do is to pick it up.
While certain scrap metal may be considered junk to others, for us blacksmiths we consider them like gold!
Conclusion
To recap, we realized that you only need $100 to get started in blacksmithing. There is no need for any special power equipment yet. All you need is just a handful of hand tools. Everything beyond that is just a bonus.
I would like to note here that as you get a more experienced smith, the requirement for a larger number of tools and equipment increases.